What Is Image Annotation? A Field Guide for Engineers
Image annotation explained for engineering inspection teams: annotation types, bounding box vs segmentation, and how to skip manual labelling.
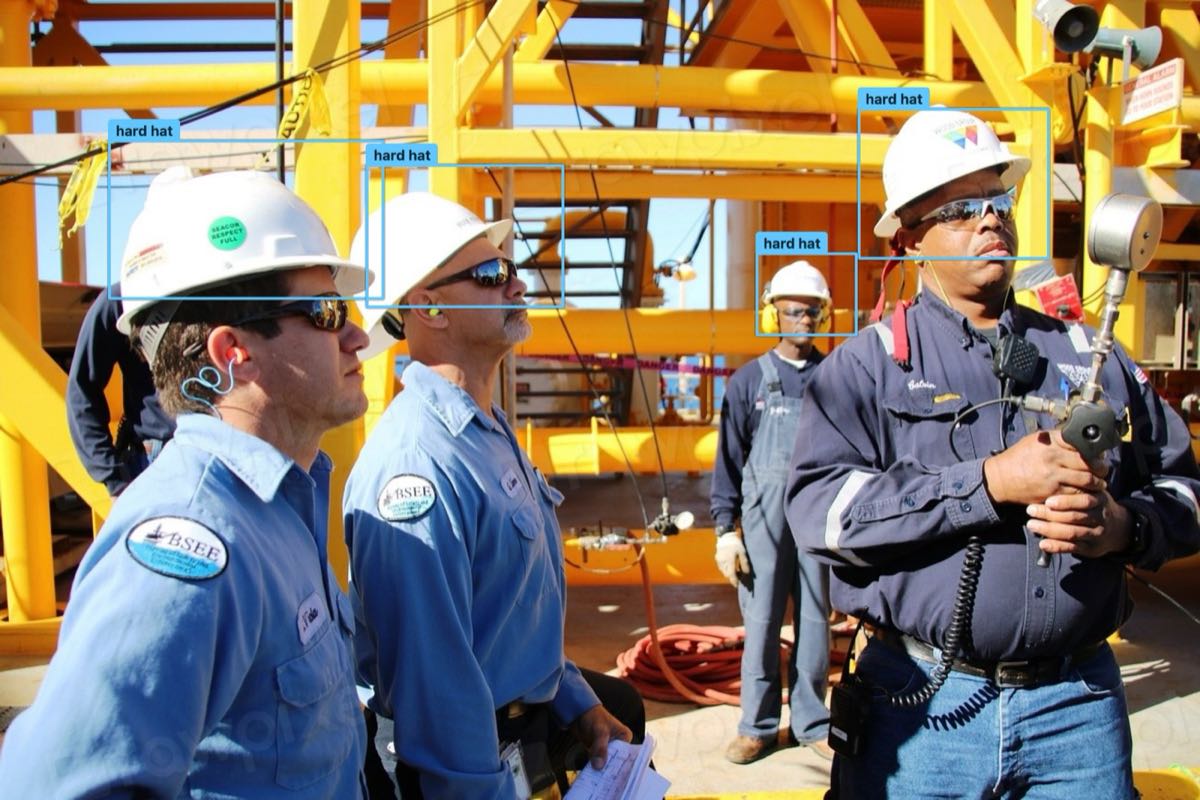
Image annotation is the process of marking up images — with boxes, outlines, points or tags — to create the ground-truth data a computer vision model learns from. It is the labelling foundation of every automated visual inspection system, capturing an expert's judgement as worked examples for detection, segmentation or classification.
Image annotation is the process of marking up an image so a computer vision model can learn what it is looking at — drawing a box around a corroded flange, tracing the outline of a crack, or tagging a photograph as "weld defect present". For inspection teams in nuclear, energy and infrastructure, annotation is the unglamorous foundation of every automated visual inspection system: a model is only ever as good as the labelled examples it learned from. This guide explains what image annotation is, the main annotation types, the difference between bounding boxes and segmentation, and why manual labelling is often the wrong place to start.
Image annotation is the task of adding human-understandable labels to images — boxes, outlines, points or tags — to create the ground-truth data a machine learning model uses to learn a visual task such as detection, segmentation or classification.
Why does image annotation matter for inspection?
In non-destructive testing, the ground truth has always been a qualified person. A Visual Testing (VT) inspector certified under a scheme such as PCN — the British Institute of Non-Destructive Testing's personnel certification, which conforms to BS EN ISO 9712 — looks at a component and records what they see. Image annotation is simply how you capture that expert judgement in a form a model can learn from. Every labelled photograph becomes a worked example: this pattern is pitting, this one is leading-edge erosion, this shadow is nothing to worry about.
That is also why annotation is where inspection AI projects most often stall. The people qualified to label a weld radiograph or a reactor-internal image are the same people you need out on the asset, and their time is scarce. Get the labelling wrong and every downstream metric — detection rate, false-positive rate, sizing accuracy — inherits the error.
What are the main image annotation types?
Different inspection questions call for different annotation types. The four you will meet most often are:
Image-level classification (tags)
The whole image gets a single label — "defect" or "no defect", or a class such as "corrosion", "crack" or "coating breakdown". Classification is quick to apply and useful for triage, but it tells you nothing about where the defect is or how big it is.
Bounding boxes (object detection)
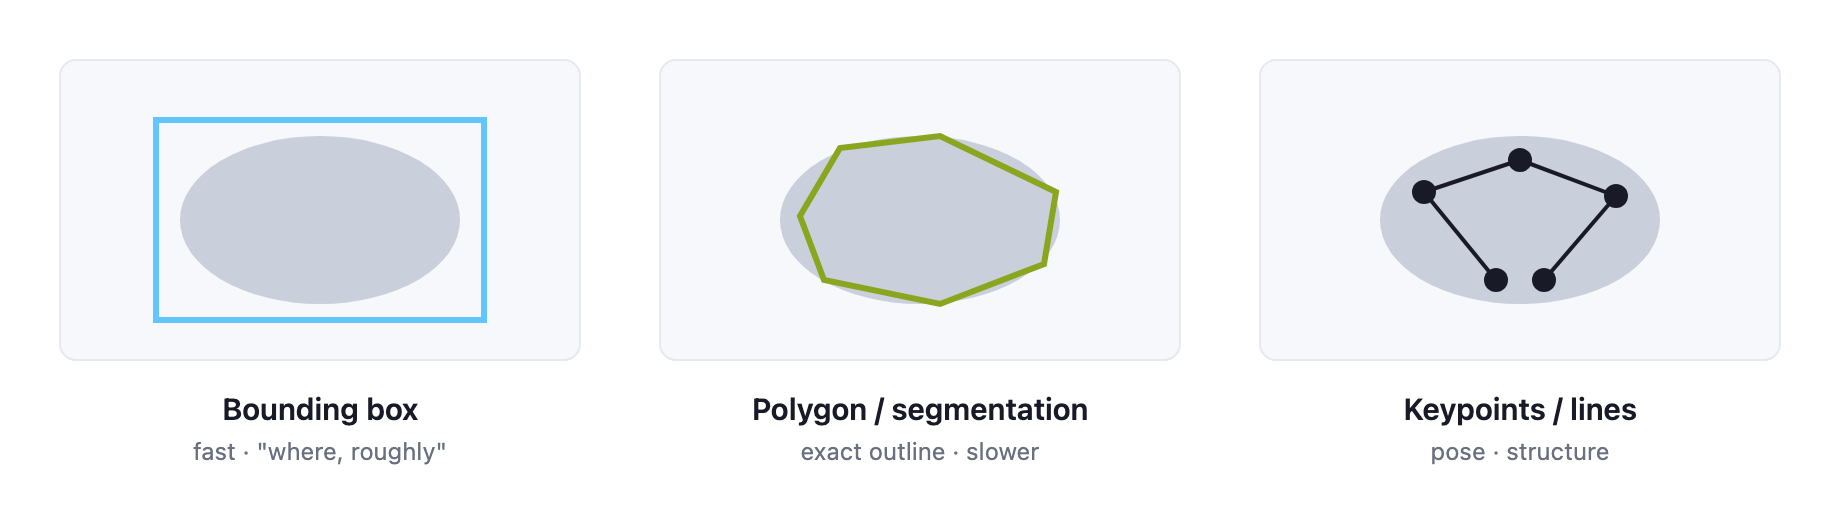
A rectangle is drawn around each feature of interest, with a class label attached. Bounding boxes are the workhorse of object detection: fast to draw, easy to review, and enough to answer "is there a defect, and roughly where?" They are the natural choice when you need to count and locate features across thousands of images.
Polygons and segmentation
Segmentation labels the image at the pixel level. Semantic segmentation marks every pixel that belongs to a class (all corrosion, everywhere); instance segmentation separates individual objects (this crack versus that crack). Polygons and masks are what you need when the shape and extent matter — measuring corroded area, tracing a crack path, or quantifying coating loss.
Keypoints and lines
Points and polylines mark specific landmarks or linear features — the centreline of a weld, the run of a crack, or reference points for measurement and photogrammetry. They are common in structural and geometric inspection tasks.
Bounding box vs segmentation: which do you need?
This is the choice that most affects labelling cost, so it is worth making deliberately.
A bounding box is cheap to draw and cheap to check. It is the right tool when the decision is presence and approximate location — flagging that a blade section contains damage, or that a pipe run shows signs of external corrosion, so a human can look closer.
Segmentation is far more expensive to label — a clean polygon can take five to ten times longer than a box — but it is the only option when you need to measure. Crack length and width, corrosion area as a percentage of surface, and defect sizing against an acceptance criterion all require pixel-accurate outlines. If your reporting has to feed a fitness-for-service or ALARP judgement, coarse boxes will not carry the weight.
A common and sensible pattern is to start with bounding boxes to find and prioritise defects, then reserve the costly segmentation effort for the minority of cases that need dimensional analysis.
Image annotation for machine learning: from labels to a model
Once labelled, images are split into training, validation and test sets — the standard terminology defined in ISO/IEC 22989, the international standard for AI concepts. The model learns from the training set, is tuned against the validation set, and is judged on a held-out test set it has never seen. Labels are the ground truth throughout, so their quality sets the ceiling on everything.
Two things matter more than volume here. The first is consistency: if two inspectors label the same borderline indication differently, the model learns the disagreement as noise. Measuring inter-annotator agreement and writing a clear labelling guide are worth more than another thousand rushed boxes. The second is class balance: real defects are rare, so a naive dataset is overwhelmingly "nothing here", and a model can score well on paper while missing the very cases you care about.
What makes manual annotation so expensive in engineering?
For engineering inspection, the classic "just label ten thousand images" advice breaks down for three reasons.
Defects are scarce. You may inspect hundreds of welds to find a handful of reportable indications, so assembling a balanced training set by brute force is slow and expensive.
Expert labelling is costly and the assets are hard to reach. Only a suitably certified inspector can reliably label many defect types, and the images themselves come from drone surveys, ROV runs or shutdown access windows that cost real money to arrange.
And inspection is safety-critical, so you cannot simply accept a model's guess. You need to know how confident it is, and route the doubtful cases to a person.
Together these mean the manual, label-everything-first approach is often the slowest and most expensive way to get to a working system.
A better starting point: auto-labelled baselines and active learning
The alternative is to invert the workflow. Instead of labelling first and training second, start from a model that already understands general visual concepts.
Open-vocabulary detection lets you describe a defect in plain language — "corrosion", "surface crack", "missing bolt" — and get a first-pass baseline with zero training data and no annotation at all. It will not be perfect, but it gives you something to review immediately rather than after weeks of labelling.
From there, active learning does the labelling economics for you. Rather than asking for thousands of labels, the model identifies the few images where its own uncertainty is highest and asks an expert only about those — the fewest, most informative labels needed to improve. Our companion guide to label-efficient computer vision with active learning walks through how this reaches a useful baseline from a handful of examples, and it sits alongside the broader automated visual inspection picture.
Finally, because the model reports uncertainty with every prediction, you can set thresholds so that only low-confidence cases are sent to a human — keeping expert attention on the calls that actually need it. When you are ready to weigh the options, it is worth comparing the routes to lower labelling costs — synthetic data, auto-labelling and active learning each suit different situations.
The result is that annotation stops being a months-long prerequisite and becomes a small, targeted activity that happens after you already have a working baseline.
Skip manual annotation — try an auto-labelled baseline
If your team is staring down a folder of inspection images and dreading the labelling, there is a faster path. Run a free open-vocabulary baseline with VisionEngine — describe the defect in words, get an auto-labelled starting point in minutes, and let active learning ask for only the labels that matter.
Hero image — Base photo — Bureau of Safety and Environmental Enforcement · CC0 · via Rawpixel/Wikimedia Commons; bounding boxes added for illustration.
Frequently asked questions
What is image annotation?
Image annotation is the process of marking up images so a computer vision model can learn what it is looking at — drawing a box around a defect, tracing a crack outline, or tagging an image as defect present. These labels become the ground-truth examples a model learns a detection, segmentation or classification task from.
What is the difference between bounding box and segmentation annotation?
A bounding box draws a rectangle around a feature — cheap to label and enough to answer whether there is a defect and roughly where. Segmentation labels the image pixel by pixel, so it can measure shape and extent, but a clean polygon can take five to ten times longer to draw.
How much labelled data do you need to start?
None. An open-vocabulary baseline lets you describe a defect in plain language — corrosion, surface crack, missing bolt — and get a first-pass result with zero training data and no annotation. From there, active learning asks an expert to label only the few images where the model is most uncertain.
Can AI replace a qualified inspector?
No. In safety-critical inspection, image annotation and automated detection act as a screening and review layer, not a replacement. The model flags candidate defects and reports how confident it is, so low-confidence cases are routed to a certified inspector. The qualified human stays the ground truth and makes the final call.
Why is manual image annotation so expensive for engineering inspection?
Real defects are scarce, so you may inspect hundreds of welds to find a handful of reportable indications. Only certified inspectors can reliably label many defect types, and the images come from drone, ROV or shutdown-access surveys that cost real money to arrange. Labelling everything first is often the slowest, costliest route to a working model.